The things I’m drawn to in life is where art meets science. In hindsight, so much of the secret is knowing how to avoid failure. Baking bread? Build the intuition over time and you’ll realize baking is forgiving so long as you don’t do these “5 bad things.” Gardening/farming? Yeah, there’s a big list of bad things. Brewing beer? Another list of things to avoid. The basic rules (rooted in science) are like guardrails and everything else is the art. I love this so much.
In my early 20s I had a week long mind meld knowledge transfer from a self taught photographer. It made me fall in love with photography. I’m still using it to this day to photograph new label printers (black plastic is terrible to photograph) and labels (oh god they are 2D!).
In case you’re like “why is this guy selling label printers?!”
I’m a solo software dev that wrote Label LIVE (electron) to design and print labels. Now I’m vertically integrating with a printer I’ve imported from China and labels made in the USA.
Business and entrepreneurship: just avoid these 9999 things and you’ll be fine! Science and art…
Another list of things to avoid. The basic rules (rooted in science) are like guardrails and everything else is the art.
Too many guides and educational material in general fail to do this. I'd try a lot more new things if along with the "how to replace your transmission" book there was "the top ten ways you could screw up replacing your transmission and their consequences" section.
Too much or too little energy when baking (burned or raw in the middle), too much or little water (hydration), too much or too little rise time (loaf density). Just off the top of my head.
Adding incompatible ingredients (like honey) that mess with the yeast culture or kill it. "Peeking" at you loaf during bake too often or for too long. If you use a home bread machine, layering the ingredients incorrectly so that different things start too soon.
An important exception to "Always PEEK before you POKE.", because peeking can change the value of what you eventually slice.
. o O ( Almost wrote ".slice". And I'm sure there's a tortured Heartbleed/Spectre/Meltdown analogy in this loaf somewhere… )
If anyone wants to move beyond using the "auto" setting on their camera (or phone), I would recommend the book Understanding Exposure by Bryan Peterson, the first edition of which was published in 1990:
The principles involved haven't changed much in the intervening decades; the current fourth edition was publish in 2016.
If all you have is a phone you don't have to get new equipment: just perhaps a third-party 'camera app' that allows you manual control of aperture, shutter speed, ISO/sensitivity.
Once you know how each of these settings alter the resulting photo you can use them to alter the composition of photos, which is a whole other craft.
Edit: seems recent smartphones have little-to-no adjustable camera settings.
I think when you break down all the variables there is really very little to play with bc no phones have variable apertures.
ISO is basically a linear gain that's done on the sensor. As long as you aren't blowing out your photo and loosing information, it basically makes not difference if you do it in sensor or later while editing
So the only variable left is the shutter speed - which is basically directly dictated by the amount of light you have. You try to get as much light as you can without blowing anything out. This is how you get the most information. You can decrease it to get faster shots with less blur, at the cost of more noise
So it all boils down to basically one "slider"/variable between blur and noise
ISO is basically a linear gain that's done on the sensor. As long as you aren't blowing out your photo and loosing information, it basically makes not difference if you do it in sensor or later while editing
This is true for some cameras, but certainly not all. Many cameras, especially pro or pro-sumer grade, have non-linear ISO. That is, there are ranges for which it behaves linearly, but typically there will be some range - say the minimum up to 1600 or something - where it behaves as a linear range, and then the next setting up from that (where the settings are typically 1/3 stop) will reset to a lower snr. (And yes, that does imply that in such cases it often yields better results to go up by one or even two clicks in ISO)
I'm not sure if there any camera-phones that behave this way, though.
Taking one of the few recent-ish mainstream phones on this list since the subthread is about smartphone sensors: Samsung Galaxy S7 has an ISO range of 50–800 and basically all the noise values (measured in log2(electrons)) are between 2 and 3. There is a downward trend from 50 to ~300, above that it's all around 2. Other phones have similarly shaped graphs with different absolute values.
That sounds like the opposite of what GP (CWuestefeld) described. Am I misinterpreting the graph?
Lower sounds better to me, so the downward trend on a scale called "Input-referred read noise" sounds like it is tuning the Signal to Noise Ratio (SNR) on the sensor rather than just multiplying the sensor's output value, and it stops doing that above ~300 ISO. GP described that it would be a linear multiplier up until (for many cameras, not specifically smartphones) ~1600 ISO and after that it would be tuning the SNR. Do smartphones behave differently for some reason or am I misunderstanding something?
(It doesn't seem as though the absolute value says anything about the quality by the way, as a 10th gen Apple phone has a much lower value on this "noise" scale than a 12th gen one. The page does remark "raw values are not appropriate for comparing camera models because they are not adjusted for area", so this is probably that.)
I'm not an expert, but I think phone camera sensors really are that different from camera camera sensors, presumably (going out on a limb) because of tradeoffs they make to get good quality from small sensors. The sensors in top phones are about the same size as in the smallest cameras, and way smaller than in the cameras GP is thinking of.
No magic and the same photons, but you can have the hardware sensor read them out differently. Specifically using varying amounts of analog gain / amplification before doing analog-to-digital conversion, minimizing noise. This varies based on camera design.
The article mentions the Sony A7S as an example, with the sensor showing marked improvements in SNR when reaching ISO 100, 200, 1600 and 3200, while behaving ISO-invariant wrt. noise in between those values.
Many cameras let you set the ISO in 1/3 stop increments, but if I recall correctly, many camera manufacturers just keep the sensitivity at the base stops and adjust the brightness via software.
So shooting at ISO 250 really means ISO 200 (underexposing what you requested) but then adding a third stop equivalent of brightening to the digital file. Conversely, using ISO 160 actually means the camera is using ISO 200 (overexposing) and lowering the brightness in software.
What this means, at least 10 years ago when I was more in tune with the photography world, is that people would prefer to shoot at the [base ISO stop - 1/3] levels to because those were the levels with the least noise near that exposure setting. The cost is you risk saturating more pixels in the highlights.
And for the same reasoning, the ISO setting s 1/3 over the base stops were typically avoided as they were noisier, albeit with slightly more dynamic range.
> ISO is basically a linear gain that's done on the sensor.
It's usually not done on the sensor - it's usually done by the ADC that performs sensor readout.
Some cameras use a technology like Aptina-DRPix to dynamically change the capacitance of the sensor FETs, but (as far as I'm aware) this only exists in a simple binary form right now. E.g. one of my cameras reduces sensor gate capacitance when the ISO exceeds 800, but otherwise any ISO changes only affect off-sensor hardware.
Right, sorry. Not on the sensor, but the hardware that's reads it off the .. which I guess is not technically the sensor.. haha
You're still multiplying what is the photo-count or shotnoise
Didn't know there is technology built on top of that... Does changing the capacitance increase the sensitivity somehow? I guess then the question is.. why isn't that always enabled. There must be some downside to it
The pixels output voltage is the charge (number of photoelectrons) divided by the integrating capacitance. Reducing the capacitance increases sensitivity at the expense of full-well capacity - because the saturation voltage is reached earlier. That’s the point at which highlights blow out.
The advantage of increased sensitivity at the integration node is that all downstream noise is applied to a larger signal, so SNR is improved.
Pretty much any serious camera, and I think even serious camera-phones these days, will optionally record the image as RAW data rather than encoding as jpeg.
That you want to shoot RAW is pretty much covered in day 1 of intro to digital photography. The only exception to the rule is when you need super-fast frame capture rate, and the bandwidth to storage of much larger RAW files interferes. This is typical of folks shooting sports.
Even then the entry level full-frame cameras will shoot something like 10 photos per second in RAW which is usually sufficient for sports or motorsports photography. There is a compressed raw mode that's required to enable the fastest capture mode but when you get into more expensive cameras like the Sony A1, it can shoot full resolution (50 megapixel) raw with auto focus at 30 frames per second which is mind blowing. It costs $6,500 vs $2,000 for the A7Iv though so you're definitely paying for it.
This is only true if you take just one capture. On Pixel, iPhone, and others we take many small captures and merge them together. There's lots of cleverness there and it allows you to have less noise without motion blur or blowing out highlights.
Computational photography is coming to "real" cameras now, too.
I just upgraded to an Olympus OM-D E-M1.3. Olympus has, unlike most manufacturers, in-body image stabilization. That means that there are tiny actuators moving the sensor around to offset shaky photographer hands. Doing the stabilization in-body gives some other nifty side effects.
Olympus cameras over the past several years have a "super resolution" mode that uses this. My sensor is only 20MP, but using super resolution I can get 50MP or 80MP (on a tripod) out of it. The camera accomplishes that by using the IBIS system to move the sensor by fractional pixels and combining them as you describe. And as you note, this in turn has the side effect of cutting noise.
I was just taking advantage of this a couple weeks ago out at Fort Davis, TX, near the McDonald Observatory, which has some of the darkest skies in the continental USA. Astrophotography is notorious for causing headaches with noise, but this technique goes a huge way to cutting that down with zero extra work from the photographer (except that the shot takes 9 times longer to record).
I think it does more than just lower noise. On my pen-f, there is a noticeable difference in the way the tones are rendered between a regular capture and the hi-res mode.
Wikipedia says the S9/S9+ was the first phone since 2009 to have a variable aperture. The S10 series also had it, but it was gone again in the S20. So it's definitely not common, and even in the handful of phones that had it, it was only one stop of adjustment.
> The principles involved haven't changed much in the intervening decades.
My problem with many old-time tutors is that they refuse to recognize that photography has gotten a lot easier. We don't need to learn the craft the way they did.
For example, you don't need stuff like the "sunny 16" rule of exposure if you have real-time previews in the camera. You use visual feedback, usually with better accuracy.
In the same vein, you probably don't need to learn about flash guide numbers when modern continuous LED illumination covers 99% of use cases without any guesswork.
Or, you don't need to learn about optical filters (perhaps except for the polarizer) when almost all their functions can be accomplished in software without loss in fidelity.
> For example, you don't need stuff like the "sunny 16" rule of exposure if you have real-time previews in the camera. You use visual feedback, usually with better accuracy.
Except that it may not, unless you know what you are doing and press the right button:
> With the monitor or viewfinder, you may see an image with an aperture that differs from the shooting result. Since the blurring of a subject changes if the aperture is changed, the blurriness of the actual picture will differ from the image you were viewing prior to shooting.
> While you press and hold the key to which you assigned the [Aperture Preview] function, the aperture is stepped down to the set aperture value and you can check the blurriness prior to shooting.
> In the same vein, you probably don't need to learn about flash guide numbers when modern continuous LED illumination covers 99% of use cases without any guesswork.
And leaving your camera in "auto" also probably "covers 99% of use cases without any guesswork"… but you give up creative control to the software. Why bother learning what aperture is at all if 99% of the time you won't ever matter to taking a photo?
The whole point of reducing the use of "auto" is to make creative choices yourself.
The point of learning Sunny 16 is that once you’ve internalized thinking in full stops, you don’t need visual feedback, which makes you faster, which can make the difference between getting your shot or not and having a happy or angry client.
> Or, you don't need to learn about optical filters (perhaps except for the polarizer) when almost all their functions can be accomplished in software without loss in fidelity.
I still think it’s a good idea to learn what they do, so you know when to use a (digital) BW red filter because you want brighter skin.
This is very well done for a new-to-photography audience. Will be sharing around to people who say all their things look like snapshots, what's up with that.
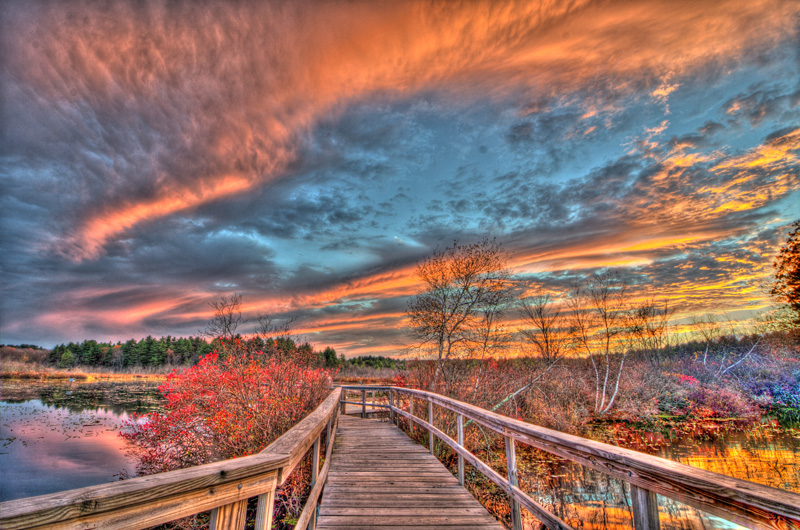
Great use of examples, except for one: kid on bridge.
> At the same time, it must be said that color and tone can be what separates a mediocre photograph from a memorable one. To illustrate, let's look at the potential evolution of this vacation shot deliberately chosen for its mediocrity...
Then the dynamism is removed by 'correcting' the dutch angle to horizon, the surprisingly good color balance is skewed off, and the whole thing gets that circa mid-2000s HDR look from Flickr and Shutterfly and the like where every photo got tone-mapped.
Underwhelming of an end result, especially compared to the later color and tone examples (e.g. kitchen superhero).
The angle is a personal choice, though I think I agree that the mirroring angles of the two bridges was more interesting than having the horizon straightened. But the final "Tone Curve Corrected" turned a fairly nice image into a typical HDR-ruined photo, where the eye can't focus anywhere because all the colors have the same value.
To add some praise with the criticism, I thought the explorations of light white the photos of the wife were well done. Pointing the rear light at the subject's back to create that subtle halo is nice and I had not considered it.
For me, the exposure adjusted is the sweet spot, the color balance step is too yellow and loses atmospheric depth, at least on my 14" macbook pro, and then the hdr makes it completely flat. I love the intent, but the results don't look great on my setup. Since it's missing a fill light on the subject, maybe should've selectively edited the shadows only on the kid but left the shadows in the canyon for contrast. All the other examples are excellent.
In the mid-2000s, HDR was all about jacking up local contrast, giving you that unique look of gritty skin and halos cropping up all over the place. I'm talking stuff like this:
Less obnoxious tone mapping that compresses shadows and highlights is a more modern trend, I'd say post-2012. It's basically done by every cell phone today when shooting a high-contrast scene.
At the time, I produced some top ranked HDRs out of annoyance, like, oh, use tone map plugin? Automatic upvotes! Called it the "Flickr craze" and polled on comparison between:
I thought those types of shots were "woah, cool!" when I first saw them. But they got old and overused fast. I'm so glad those days are (mostly) behind us. It's interesting to me how that came and went as a photography "fad" in less than a decade.
Straightened and exposure adjusted is good. They should have stopped there. White balance tweaking is often a bad idea; what you want is to get as natural colors as possible.
This article doesn't touch on the most important aspect of the trade, something that makes a shot into a photograph: the choice of a subject.
You can make the most technically perfect shot, and yet it would still look bland and empty and boring if you don't have a subject.
No amount of technical understanding will help you choose a subject, as it has to do with with curiosity for the world and the art of observation.
A shot originates in your camera. A photograph originates in your brain.
Worth reading, in my opinion even before you pick up any technical book: Roland Barthes - Camera Lucida, reflections on photography.
This is not a counter point, you're agreeing with what the parent comment said. Choosing a subject doesn't mean only photographing "interesting" things.
I understood the parent comment like so: if your subject is not interesting, no amount of technical mumbo jumbo will make your photo truly great.
Whereas the counter point is: if you get the technical aspects right (especially composition and light), a simple piece of wrapper paper can become an interesting subject.
The counterpoint is quite moot, in my opinion.
The shot of a candy wrapper is interesting if it expands its meaning beyond just being a candy wrapper.
No amount of technical prowess would make it a picture. You need context, you need that object to be part of a larger story, or maybe be the story itself.
Where was it found? What might its presence in the place where it was pictured represent? And so on.
It has way more to do with semiotics, than with the technical nature of the image itself. Technique will never make a non-subject into a subject.
Strictly technical-minded people hate to hear this, because they want to think that becoming a good photographer means mastering the physical and measurable, wheres that just makes you someone who's good at shooting technically correct pictures, that's all.
By this measure, underexposed, blurry or grainy picture are never good photos. And yet, any great photographer understands perfectly that value of technical mistake as well.
When there is nothing that stands out, I usually resort to playing with the compensation dial (or you can do spot metering) to get some silhouettes and light-dark dynamics. Also look for reflections or different angles.
That's very neat, it's almost the opposite of the problem you usually have when photographing people, but it works really well to create a unique mood.
Yeah, I seem to understand the art of photography goes through different stages of mastery:
- Level 0: Newbie.
- Level 1: The art of lighting, composition and colour theory, i.e. this article. This is very technical and scientific.
- Level 2: The choice of subject and hidden meaning, if any, of the picture. This is more abstract and "artistic."
Many skilled photographers don't go past level 1. I reckon the reason photography is such a common hobby is because it can attract both technically- and artistically-minded people.
And then the next level yet is to do a series of photographs encompassing a common theme and message. And then developing a personal style perhaps? Not long ago I've participated in a local photo marathon, where you get a piece of paper with themes to interpret in limited time, there are checkpoints as well. Lots of walking and running around, it was really difficult, but I would recommend anyone dabbling in photography to give it a try.
Can we all stop for a moment to appreciate this fantastic content?
Great writing, with well-picked and carefully crafted examples, with lots of good (and correct) advice. On a web page. That you can just read.
If you don't appreciate this, let's describe what this website is NOT: it is not an ad-ridden cesspool of misinformation with auto-generated text interspersed with ads. It does not smack you in the face with a SUBSCRIBE NOW popup. It does not drag you through the mud of misleading "customize my cookie preferences" dialogs. It has zero trackers. And the information is not posted on Facebook, Tumblr, Blogger, Medium, or any of the other black holes where content goes to be stamped with "SUBSCRIBE NOW LOGIN NOW" popups and eventually disappear and die.
Michał's writing is excellent (his "Guerrilla guide to CNC and resin casting" at https://lcamtuf.coredump.cx/gcnc/ is a classic already), but it's not just the writing that makes this content so great.
When reading this, I am reminded of the early days of the web and it makes me happy.
Totally agree but now I wish the author would get some kind of small reward for his effort so that he's incentivized to keep writing this kind of content.
Longer focal length, more zoom, more perspective compression, more blur outside of the focus area.
Wider open arperture, more light on the sensor, more blur outside of the focus area.
Longer exposure time, more light on the sensor, more motion blur.
Bigger sensor sensitivity (ISO), more light collected per unit of time, more grain/noise.
Bigger sensor, bigger field of view, more blur outside of the area of focus.
Then you also have neutral density filters (ND filters), which allow you to modify the exposure time/aperture while keeping the ISO where it is (e.g. if you wanna blur the background in bright sunlight).
You become a good fotographer if these interconnections are so well understood you don't need to think about them anymore — and you can focus your effort on finding the right combination of camera position, angle and lense settings.
The position and angle is what makes and breaks a good picture. This is why a good photographer with a smartphone takes better pictures than an amateur with a Hasselblad.
> You become a good fotographer if these interconnections are so well understood you don't need to think about them anymore — and you can focus your effort on finding the right combination of camera position, angle and lense settings.
Much like any skill: music, computer programming, cooking, etc. Mastering the technical fundamentals liberates you from having to worry about the technical fundamentals.
The main thing about photography is your first 10,000 photos will likely be bad. Modern technology makes it possible to get through 10,000 snaps much faster and much cheaper than when using film.
But taking those photos is not enough — it’s in the editing of those first 10,000 photos that you will find the hidden photographer in you.
Photography is a lot like writing code: you can create something that does the job, but does not do it beautifully. You can keep on creating until creating beauty becomes easier.
If you take a workshop or two, you'll better understand the thought process of a photographer, leading you to start taking descent photos within 1000 snaps.
I agree with the need to edit for improvement - meditating on your composition and lighting will ingrain better camera habits for the next round of snaps.
Personally, taking analog photos with an exposure meter taught me about good exposure. Measuring exposure takes time, but it's a great learning process.
> it’s in the editing of those first 10,000 photos that you will find the hidden photographer in you.
Instead of taking 10 000 photos, then sifting through them, and then editing them... Take 1000 photos, but take the time to take them: wait for the right moment, come closer, step to the right, anticipate a moment, find great in the mundane. This will make you an infinitely better photographer.
I wouldn't say it's your first 10k photos. Because anyone can just hold down the button and take hundreds of photos. And those hundreds of photos don't really count as separate pictures in this regard.
I would say that it's more like your first 10k different photographic compositions/subjects.
From there, I agree that you really learn in the editing.
For me, it truly was after my first 10K photos — speed shutter and all.
Once you sit down and go searching through that burst for the perfect or otherwise usable photo of that burst, you start to notice the small things: the slight detail changes at the edges, what may have transpired between captures, how a light source that changes in milliseconds can affect the overall feeling.
It took me about 2.5 years to reach that point. Shooting at different times of the day, different seasons. Countless hours tweaking levels and cropping in Photoshop, Capture One, etc. Lots of changes in gear: UV/haze filters, circular polarizers, tripods, zoom lenses, prime lenses. Flashes, reflectors, gray cards. Exploring the different modes on my camera, Magic Lantern firmware, etc.
It all counts. But the post processing is the crucial part of the feedback loop.
reminds me of that most quoted lines from Bruce Lee, "I fear not the man who has practiced 10,000 kicks once, but I fear the man who has practiced one kick 10,000 times."
same as what you are indicating here. Deliberate / mindful practice leads to significant improvement.
I have a heap of photos that I'm very happy with from my first 10,000 exposures, and I'm sure that if I went back and re-edited them I'd have more. I think it's only when you start to dial down into trying to achieve a specific look where it takes some time and effort.
Good advice and good writing. But the title is misleading: this is photography for aspiring photographers, not esp. geeks. I was expecting more geeky things.
For example, I have recently been toying with making a kind of photobooth / selfies machine for parties by connecting a DSLR with a Raspberry Pi; people take pictures of themselves with a remote (the excellent Yongnuo RF-603 which is radio, not infrared); the Pi downloads the images (with gphoto2), resizes them, prints the date, and uploads to a server.
People can see their images on their phones less than a minute after it was taken. It's a lot of fun.
Around 2012 I was asked to make a photo booth for a friend's wedding. I ended up managing to rig an old-fashioned doorbell to an Arduino to give me a 3-second countdown, attached to a DSLR for the photo, an eye-fi card for the wireless connectivity because I think the camera didn't have on-board WiFi, and an iPad attached outside the both that always showed the last photo and let you scroll back.
I think I'd have to recreate it from scratch if I had to do it again because I have no idea now.
Yeah, Eye-Fi (the company) doesn't exist anymore, probably because newer cameras all have wifi. But for a photobooth at a party that needs to run unattended, it's better to use an old camera you don't care about too much ;-)
Having gphoto monitor the camera constantly (my first attempt) is not a good solution, because if for whatever reason the connection to the camera is lost, gphoto just dies.
In my current setup, gphoto downloads new files at regular intervals (via cron), puts them in a directory on the pi, which is then rsynced to a server. This is very resilient: it survives rebooting the pi, turning the camera off or on, etc., with zero intervention. All it needs is a network connection to the Pi (wifi or ethernet) and nothing else. No app, no phone nearby, no bluetooth, no nothing ;-)
I use an old Pi 3 for this that's plenty fast; it would probably work on a zero (but I've never been able to buy one) or other single boards. Ideally it could be put in a small box that could be mounted on the flash shoe and that would also act as a remote...
Somewhat related but if anyone is looking to get into photography Fuji is putting out digital cameras that emulate their film stocks. The results are pretty incredible. Also they have manual dials on the top so you're not trying to program a computer to use it. It's like driving a manual transmission vs an automatic.
I'm very happy with my xt-30 and a combo of 35mm f2 prime + 18-55 kit lens. This is my first interchangeable lens camera though, so take it with a grain of salt. I don't miss the ISO dial found on the more expensive models, because I like to keep the ISO on auto and don't worry about grain and noise. The mode dial on the left is a bit gimmicky and the autofocus can sometimes struggle, but overall it's been nice. I have been eyeing the x100v but so far I can't justify the price, and I'm not sure the fixed 23mm would work for me, I love the flexibility of the zoom lens. I only wish there was a lighter zoom lens, like the 15-45 but without the power zoom and maybe f2.8. I also love using the film modes, specifically Astia with the color chrome on max is my go-to choice, I don't have the time and will to edit so I like good jpeg results straight out of camera.
Would recommend the X-Tx range over the X-Ex range, as they have an ISO dial on the top at the cost of being slightly bigger and heavier. I have an X-T2 and it's great, but obviously the X-T4 etc will have more features.
One BIG caveat with Fuji though is that the X range use an APS-C sensor instead of full frame, so if you get into vintage lenses (really good fun) your effective focal length is times by 1.5. Your nifty fifty becomes a 75mm because it is making an image too big for the sensor (so it's cropped).
Another thing to note - if you do shoot RAW (I would highly recommend this for maximum post-processing fun), you won't benefit from the camera's film simulation profiles as it isn't handling the render (to JPEG). However, all is not lost. All of these color profiles are embedded into the RAW file (I think that's how it works) so that whatever software you are using (Lightroom, Capture One, etc) can pick them up and select the profile you shot in to render it when you import the photos (on LR it's like a dropdown in the settings somewhere). It is quite cool to shoot in black and white, and then surprise people with being able to switch the colours back on :)
The profiles aren't EXACTLY accurate to the onboard processing, though for me it's good enough. However if you do want to shoot raw and get the perfect film simulation Fuji provides a tool: https://fujifilm-x.com/en-gb/support/download/software/x-raw... which uses the camera's onboard chip to do the processing at your convenience.
They also have the GFX series which are medium format, take absolutely silly quality pictures, and have the price tag you might expect attached.
I’ve done this and found it fairly annoying to manage, and of limited value because if you’re editing a shoot you will want to have some visual consistency which means if most are RAW that you have given a style to in your edits, the same settings will look totally whack on any JPEGs anyway.
For one offs? Maybe I guess.
Some people also swear by editing at the point of shoot (Ken Rockwell for instance, but his logic sounds absurd today) and thus use JPEG.
I just shoot jpeg + raw because my body has dual cards so I'll always have a backup in raw format, if the jpeg card fails. I've found that I'm editing raw so much less because I love the look I'm getting straight out of camera. I shoot a lot of instant film so shooting this way digitally works for my workflow, but I understand why it might be complicated if you like a jpeg but then need to modify a raw to conform to it.
If you want interchangable lenses look at the X series, XT-3, XT4, XT5 (just released). X100V is sold out to eternity due to popularity. XPro3 is popular too.
See also, Marc Levey (CS professor at Stanford specializing in computational photography) gave some good lectures at Google a few years ago on digital photography:
The word "Levoy" does not occur on the page. Perhaps the site's author should have put their name in the page title instead of, ironically, embedded in a picture on the page's header!
All good advices. I've been taking pictures for a decade and reading books really does help more than a lot of online stuff you find. Also, looking at masters' photographs and reasoning about how they were made. After some time when I thought composition was all that mattered, I realised that light is all that matters. I use only natural light, so that means I shoot only when the intersection of good light and free time is not empty, but this has improved my craft.
Seeing as this is photography for geeks: Colour temperature is exactly that, a temperature.
Things glow when hot, with the colour of the light depending on the temperature and the material. When you say "a colour temperature of 6200 K" it means the light is the same colour as that emitted by an ideal black body at that temperature. It's no coincidence we perceive colour temperatures around the high 5k to low 6k as white, because the surface of the sun is around 5800 K.
In practice vast majority of scenes are not illuminated (directly) by a blackbody source, so for white balance purpose its inherently crude tool to achieve a color look, and often there is no "correct" color temperature setting for a scene
Yup, of course. That's why software like Lightroom usually has a "tint" slider next to their colour temperature slider. It's just that "colour temperature" seems like a pretty weird turn of phrase (and the article seemed pretty befuddled by it), so it's worth knowing what it actually means.
I'd be curious to know if any beginning photographer could actually put those tips to good use. I find it odd they did not cover adjusting exposure with ISO, shutter, and aperture. Getting the right exposure, and not blindly accepting auto-exposure, is probably the most fundamental skill to develop, and is usually where most teaching starts.
The example I use as to why auto-exposure is unreliable is that most manufacturers have auto-exposure adjust to produce 18% grey (there's some variance in manufacturers). So if you take a picture of a white wall, the camera will expose it as 18% grey. If you take a picture of a black wall, the camera will expose it as 18% grey. As the photographer, it's up to you to decide if you wanted the wall to be black, or show fine differences in shade, you can't do both well at the same time.
> not blindly accepting auto-exposure, is probably the most fundamental skill to develop
Bit late to the party (why is hn so ephemeral) but this made me realize that my Samsung phone camera has literally 1 option to adjust: exposure. Sure, zooming is also default-accessible but that's selecting what to capture than photo-technical adjustments of what you're capturing. Any other such slider, you have to go into pro mode. Never realized this was the most fundamental skill but why they picked this just clicked into place!
> if you take a picture of a white wall, the camera will expose it as 18% grey. If you take a picture of a black wall, the camera will expose it as 18% grey.
That sounds like the two pictures should look the same in the end, then. If the walls are perfectly black and white and nothing else is visible, of course, but even with imperfections it should still look similar and not necessarily recognisable as a white or a black surface. Am I understanding you right?
I think for learning photography today, using a film camera will very likely wasteful, unless you are pursuing a photography degree, for example.
Get a digital camera. Instant feedback and histogram are very useful for judging your exposures. Once you are comfortable with that, you may pick a film camera.
That would make the whole learning process way slower.
I remember a few old lecturers saying they learnt programming on punch card computers, which you have to wait a few hours just to get a simple code running. Usually, you are not lucky enough to get it right on first time. Fix some errors and compile... repeat until it runs. More waiting time.
You can force yourself by setting everything to manual on a digital camera. Especially on a non-pasm camera, like fujifilm, where you can see and control physical dials.
It's still way too easy with digital mirrorless where you have a tight feedback loop of being able to see the image respond to adjustment live, and also there's no cost associated with pulling the trigger.
I guess the best thing to do would be turn off exposure preview (so you can't see what settings are going to look like and the EVF becomes "dumb"), and perhaps buy a tiny 512MB SD card or something so you can only fit 26 or so RAW files on it :)
Why is it a virtue to make things hard? The analogy of "if you truly want to learn programming, you have to do it with punch cards" feels apt.
Instant feedback is good for learning. I sometimes feel that old-school photographers are just kinda bitter that it's a lot easier to take competent photos today than it was 20 years ago, and think it's not real unless you're carrying a light meter around.
Actually, today the quickest way is to start with a digital camera, but the caveat is that you must have discipline not to fall into the technography trap.
Technography is not photography.
I can take a photo without a light meter.
Zone focusing and the zone system are a thing, even today.
The idea behind making things hard for yourself is to develop a discipline and way of seeing the world without assistance. When you get this superpower, you will use the digital aids in a completely different manner.
The instant feedback is so bad for the development of photographers mind, that some brands like Leica and Fujifilm have a digital camera without screen on their back.
P.S. Not every debate is a generational war. I have learned plenty from the young, but in my view ignoring the knowledge of the past is not a good thing. In photography and the arts in genereal, slowing down is a feature, not a bug.:)
Thank you. I came here to post the same thing. Glad to see these three books mentioned. :-) But as another said, The Print is only for the "chosen ones". I have all 3, and I find "The Print" to be an informative joy to read, but not as necessary to the taking of the photos.
I thought so - until film photography prices began to skyrocket. Then I bought a quality second hand DSLR body compatible with my 35mm film lenses, and haven't regretted the decision, not for a minute. The investment has since completely paid out. Great books otherwise...
This is good, I would add that “made up composition rules” are instead “made up composition guidelines”, that people should learn how to deviate from after constricting themselves with false constraints
Artists will not have a common answer to "Are there any rules in art?". Personally, I think there are patterns in art, and there are often rules that can describe those patterns. Oddly, I think the word rule works out OK. 'guidelines' is problematic in another way as it also implies that one is being guided towards a certain aesthetic/end result.
A lot from the article will not work, because the terms are too overloaded ("three point"). SD photography and lighting keyword dump I've tested for 1.5:
Golden hour is great if you want things to be very warm. Sometimes I throw in a (sun behind subject) as a negative prompt to reduce the "sunset" effect
An interesting site with lots of information about 35mm photography and film vs digital techniques is 35mmc.com. Here for example is a very clear and concise discussion of depth of field and the factors that control it (such as aperture, focal length):
Re: focus. Most cameras focus on shutter button half-pressed. Learn to use this by focusing first (with a half-press), framing, and then taking the picture by finishing the press (not doing a complete press again as that would reset the focus point).
Some cameras let you have a focus button different from the shutter button. This can be super useful and can become natural after a little while.
Or even use manual focus. Want to do "artistic" photos? Get lens with wide aperture (below f/2), it has very low depth of field, so you can focus on your subject and have blurred background. After using "normal" cameras all my life, I've recently (less than 3 weeks ago) bought cheapest mirrorless camera and bought f/1.2 lens (50mm without zoom, those are cheapest lens there are). First photos of my dog were so sweet I instantly fell in love with that camera and lens.
I was going to ask the stupid question "why bother with special lenses to introduce unsharp parts if you can just destroy details in software still anyway" but I think I realized the answer, in case anyone else has that question also: introducing it later depends on knowing which parts were further away. Pictures (typically) don't have depth/distance information for each pixel.
That's kind of the point. The perfectly lit and exposed pictures they took for demonstration purpose are infinitely less interesting that the well composed ones.
From my experience, a well composed picture with technical flaws will always be more interesting than a studio perfect picture showing something uninteresting.
I'm intentionally provocative with this comment in that I don't entirely disagree with the article. Contrary to what's stated, I do think that composition is everything. Still, I also think that lighting is a part of composition.
As with any art form, it takes getting creative to make something amazing. It's super helpful to know what each part of the camera does, but also what you can do in spite of them. One of the best lessons I learned in my high-school film class was that lighting is important, but never a limitation. The beginning of this article talks about avoiding/using certain lights, but I would argue against the need of having the perfect circumstances for a photo. The combination of two flashlights in the dark or car sunshades in the sunlight are creative ways to make any camera take sharp photos with meaning.
Nitpick: 'collimated' is a technical term for a beam of light where all the rays are exactly parallel. When using 'collimated' in the article, the author means 'focused' or 'narrow' - as in, the focused beam of light emanating from a spotlight, which spreads out slower than an omnidirectional light, but isn't strictly parallel.
You'd think that an article titled 'Photography for geeks' would take some care to get the technical terms right!
Pretty awesome overall, one improvement would be to shoot the model in the focal length shot face on to better illustrate the big nose, no ears (too wide) and pancake face (too tele) effects
> Telephoto optics tend to produce shallow DOF; wide-angle lenses keep almost everything in focus most of the time.
Isn’t this incorrect?
I.e. the article itself states that telephoto is just a crop of the wide angle. And sure, the background gets “larger” and if that changes the composition, it might make it look less busy. But the DOF (blur factor) stays the same.
Great article. In case the author stops by: Why no mention of CRI? It's definitely a great geeky topic, and the article links out to professional lights with exceptionally high CRI.
For anyone else who's not a walking TLA dictionary:
> color rendering index (CRI). CRI is a quantitative measure of a light's ability to reproduce the colors of objects faithfully in comparison with an ideal or natural light source.
Unrelated to the content: I'm curious about the domain! It's the first time I've come across a Christmas Island (.cx) domain since the infamous one back in the '00s.
Whats a good intro book to understand optics that is technical but doesn't completely overwhelm (bonus if it includes how vision works from a physiological level)?
The author gave a nice general overview of the topic.
But the thing is, none of these technical things are essential.
Like a lot of people here (me included, but I am actively trying to get rid of it) the author has an engineering mindset, that was built (I am just guessing here) through years and years of engineering work.
And it is really cool and may give an advantage in some professions (and sometimes in life overall), but it is not the best approach to photography or in any other arty topic where one could not objectively measure pleasure and value, and where aesthetic perception is the main definition of something being excellent and desirable.
People often forget that photography is still mostly an art form. And in art, the most important aspect is provoking some kind of emotional response (folks mostly pursue pleasant ones, but it is not limited to that).
To understand lenses, focuses, and shutter speed
how much time does one need? A couple of days? Weeks?
It is objectively easy to learn the rule of thirds, focal points, white balance, etc. But which white balance makes beautiful images? Which calculations would make your friends adore their faces in the photo?
I have no answer to that, do you?
Should images be dark, moody, and sharp like Roger Dickens's cinematography to be likable? Or dark, blurry, and saturated like Wong Kar-wai movies? Or they should be bright, light, and symmetrical like Wes Anderson's fairytales?? Or grainy and geometrically precise like Henri Cartier-Bresson's works? Or maybe images need to be provocative, erotically charged black-and-white photos, fashionable and borderline pornographic like Helmut Newton's works?
There are a lot of cases then some person with a developed sense of beauty creates unimaginably stunning photography by using a smartphone build-in camera, but even more cases when someone with a pricey a-la Hasselblad, titan tripod, cinema-level lenses, 5-point professional lighting, and a long list of detailed photogear videoreviews making the most boring and forgettable images possible.
Feelings > Any technical aspect, rules, or calculations
I am not saying that knowing your tools is not important at all, but it definitely less important than the internet wants it to be.
For example, I know a Magnum agency photographer who takes all his photos with any digital SLR in auto mode (p-mode). And he adores Instagram.
So for any person who wants to start into photography (but not photography-related technology), I suggest watching a lot of photo books and cinematographically superior movies (all by critically acclaimed authors), visiting classical art museums, and for all costs avoiding any online photography communities.
And you should take as many photos as possible every day. Not only on vacations or holidays but just as a visual diary with colors that you found beautiful, unusual patterns that you start to see around, and unexpected shapes that things around us are forming.
Aesthetic goes first. It should be like a tingling feeling on the tips of your fingers when you see something interesting. Then from it go lighting, composition, and color. And these three are codependent.
You need to start seeing light, feeling colors, and thinking in shapes.
Need to develop your sense of beauty and your watchfulness/visual awareness/contemplation (sorry, I don't know how to translate this properly).
One cannot create beautiful photography if one does not know what beauty is.
I've been reading this forum since years, and generally its perception of photography is rather technical and very proud to achieve perfect photos with the right color balance and all that. Sure it's nice to know all those technical concepts, so you can be conscious when destroying them, and have fun.
Concerning photography tech, it's great to talk about sensors, how mobile camera is being achieved nowadays, like explained in those Pixel blog posts, or even about analog photo development works.
Hey HN, enjoy bad photos, take pictures with the worst camera you can find. I've read in some comments here that you need to take at least 10k photos first until you get better, this is not a sport
I've been taking pictures for a few years now. Not all of my photos are fit for Wikimedia Commons, but I've put a lot on [1], especially of baseball players and buildings (just what I happen to enjoy photographing).
I began originally with point-and-shoots, which I borrowed from my parents and basically used as they're designed: pointing and shooting. The quality of those early photos is not always great. But with time, I learned how to get a quality shot of a person or action (in baseball) and how to wait for the right moment and so on. This was without cheating (using burst mode). Of course, you don't get 100% of the moments that are interesting. Sometimes someone blocks you, sometimes it just doesn't happen at the right time, sometimes you're eating a snack. It's OK. The most important thing is to get a lot of practice taking pictures of the thing you like to photograph.
You might thing non-moving subjects are easier. They are in a way. But if you are photographing buildings, for instance, then you should care about straight lines and getting the right perspective. This can be infuriating if you know what to look for. People move, but at least we humans don't have straight lines or flat surfaces and so it's pretty easy to capture us from many different angles.
The point-and-shoots helped me develop my sense of timing. You don't need to use a point-and-shoot for this, though; a better camera will be perfectly good (and give you better image quality). You can get a used DSLR for pretty cheap. The switch to interchangeable-lens cameras (DSLRs, which are a bit older, or mirrorless cameras, which are newer) will give you the opportunity to try out different lenses, which make a huge difference for your photography. (By the way, DSLR lenses can generally be used on newer mirrorless cameras.) My first photography-changing DSLR lens was a Canon 70-300, which made my baseball photography much more credible. You don't need to practice to use a new lens, of course. But if you practice using some, then you can gain a better understanding of the importance of focal length (and aperture) to your ptohography.
The next step is getting out of auto mode and getting a full understanding of manual exposure and RAW. For me, for a long time, I shot mostly in a program mode on my DSLR because I only saw through the optical viewfinder and wanted my exposure to be right, especially as I was shooting JPEG on small SD cards. That's all very well. But to get to the level I am at now, I needed to start shooting in full manual (the mode I now use 99% of the time), and shooting in my camera's RAW format (which gives you MUCH more editing latitude in basically every way, as well as the full quality of your camera).
Using a contemporary mirrorless camera can actually make manual exposure significantly easier. You can now see your exposure in your viewfinder (generally this can be turned off, too). (On DSLRs from the last ~ten years, you can get this same feature by using live view --- i.e., shooting with the back screen rather than the viewfinder.) This can confirm your exposure visually and also get you more familiar with the different settings and how to "eyeball" it even on a DSLR/without exposure simulation in the viewfinder.
At every step, practice is key. If you want to take pictures, go out and do it. It doesn't matter if they're bad. They will not all be good, especially not at the beginning. Find the things you like to photograph and keep at it until you are happy with what you're doing. (Or, if you find you don't like photography, that's OK, too.)
In my early 20s I had a week long mind meld knowledge transfer from a self taught photographer. It made me fall in love with photography. I’m still using it to this day to photograph new label printers (black plastic is terrible to photograph) and labels (oh god they are 2D!).
I’m doing an OK job. Room for improvement but fine for the initial launch. You can see them here: https://mydpi.com/products/professional-synthetic-direct-the...
In case you’re like “why is this guy selling label printers?!”
I’m a solo software dev that wrote Label LIVE (electron) to design and print labels. Now I’m vertically integrating with a printer I’ve imported from China and labels made in the USA.
Business and entrepreneurship: just avoid these 9999 things and you’ll be fine! Science and art…