I really want to learn React Native and this looks like a fantastic tool. Does anyone have any documentation that easily explain design patterns in RN? Does all code live in 1 file?
Yup, for sure. In the week 1 update I actually briefly talk about the stack. But future updates will go more in depth with things like db query profiles. http://johnomar.com/powwow-progress-week-1/
I appreciate this is a big ask but I find this incredibly interesting and would love to know how it works, would someone mind walking me through some of the main functions please? Which files on GitHub are actually doing the work to keep the truck within the correct lines? Does this learn as it goes or have they somehow trained it before hand?
1. Grab the game window with `FindWindow("prism3d", NULL)`.
2. Get an image of said game window with `hwnd2mat` (found in windows/src/hwnd2mat.cpp). This part is complicated, as it deals with the Windows API.
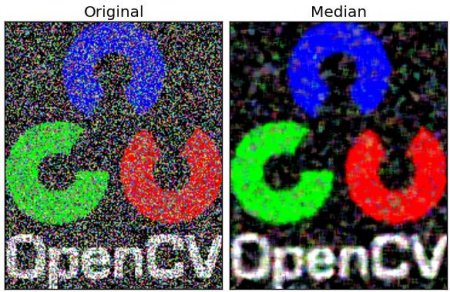
2. Apply Median Blur to the image, as shown with this transformation[2].
3. After creating the 4-point correspondence between the input image (`image`) and the output overlaid image, (`outputImg`), create an IPM object that will perform the Inverse Perspective Mapping. This is a function that turns a flat-angle shot into an overhead shot [3].
4. Resize the `outputImg` to 320x240 for the smaller window.
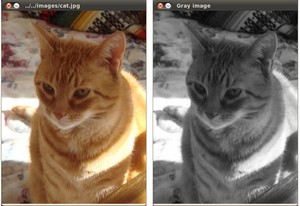
5. Convert `outputImg` to grayscale, storing the result in `gray`[4].
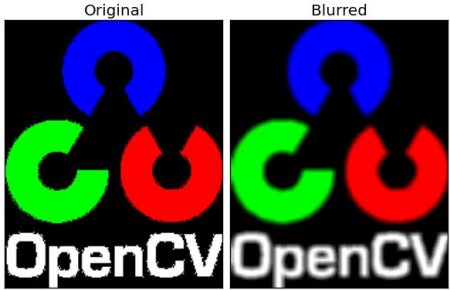
6. Perform the `cv::blur`[5] operation on `gray`, storing the result in `blur`. This reduces noise in the image; there are artifacts gotten from the Inverse Perspective Mapping.
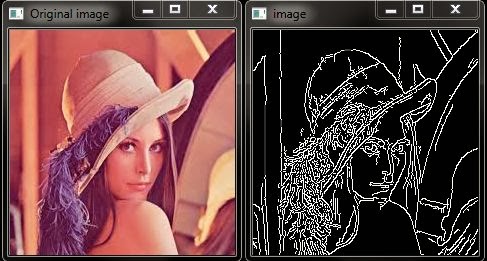
7. Perform the `cv::Sobel`[6] operation on `gray`, storing the result in `sobel`. This gets all of the outlines, including (surprise!) the lines on the road.
8. Perform the `cv::threshold`[7] operation on `sobel`, storing the result in `contours`.
Result at this point: A flat perspective of the road has been turned into an overhead perspective, converted to grayscale, blurred, turned into an outline, and then thresholded to solely have the lines on the road. Note that there's an option to perform Canny[8] as well, which is another alternative.
9. Create a `LineFinder` object `ld` (found in /windows/src/linefinder.cpp).
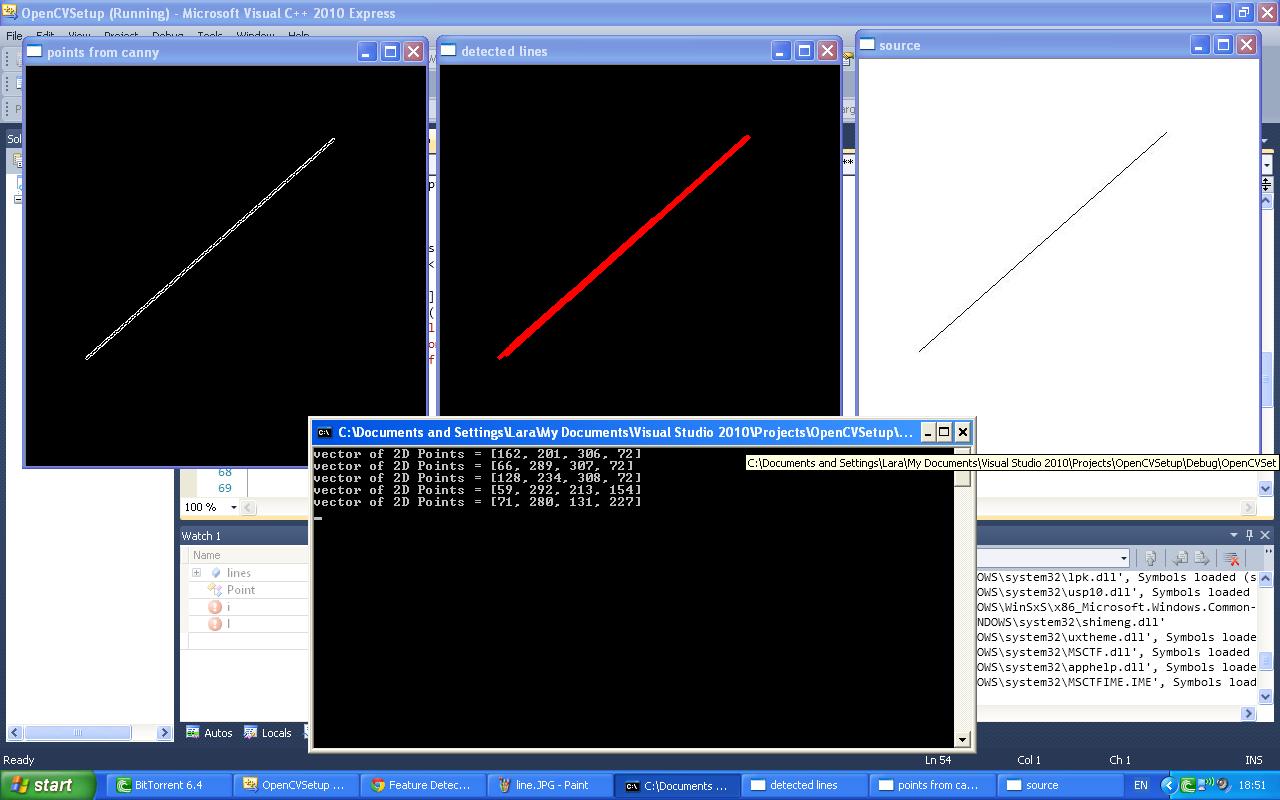
10. Perform `ld.findLines` on `contours`. This performs the `cv::HoughLinesP` operation[9], returning a vector of lines (`vec4i` is a vector of 4 integers that stores x_1, y_1, x_2, y_2). It'll use these to draw the detected lines for informational purposes.
---
Okay, now we have a black-and-white image of road-line contours, stored in `contours`. Unfortunately, keyboard and mouse input doesn't work in Windows, so we have to go over to linux/src/main2.cc. Note that the line-finding part is the same thing but requires some Linux-specific stuff to get the original image of the game.
Starting from Line 198:
11. Define the center of the image to be `bottom_center` at column 160.
Our x-value for the pixel values is going to be `j`. Our y-value is going to be `i`.
12. Create a for loop that iterates through all values from y = 240 to y = 30. Inside this is effectively two loops - one that acts on the x-values from 160 to 10, and one that acts on the x-values from 160 to 310. This loop looks at the pixel in the (j, i) spot in `contours` and sees if it detects a line there. If it does, and it hasn't found a line yet, it sets the `center_to_right` and `center_to_left` values, respectively. This finds the x-values of the left and right lines. I think you know where we're going from here...
13. Create a `centerline`, which is going to be the average of the two.
14. For informational purposes, gather the average `centerline` values and the average `center_to_left` and `center_to_right` values.
15. Move the mouse according to how far away `centerline` is from the center of the image. I don't know how to move in ETS, so I'm going to take their word for it that their gnarly-looking trig function is on-point.
Right now I'm changing SendInput to use mouse simulation instead of pressing keys. Hopefully this will fix some of the lagging caused by pressing keys too fast / too much.
This sounds real similar to Project 4 of Term 1 in the Udacity Nanodegree (Advanced Lane Finding) - basically using OpenCV on a video to find the lane markings and highlight the road.
The only real difference is some of the order (in the project, you first have to fix the camera distortion, then do the image thresholding, then warping the image from "perspective view" to "overhead view") and the lane finding (where you do a "windowing" method to find the lines after doing a histogram search to find the start of the actual lane-lines; after that, you essentially do a polynomial fit of the found pixels, which you then use to render the road shading, then re-warp that from flat back to perspective and overlay it on top of the road image).
Can you tell I just recently completed all these steps...
I'd just like to say that your code is extremely easy to read and follow, and this was a pleasure to do.
Thanks a ton for showing a real-world example of how to use OpenCV. The examples given by the official documentation are cute, but they're individual tools that you have to combine intelligently to make something useful.
Great article, thank you! As a developer I often dream about having a startup. I don't want anything large or fancy but a nice little SaaS app that can generate some income. I'm absolutely terrible at marketing and I can never seem to come up with a good idea / product. Do you have any suggestions as to where I can get inspiration for products or find markets that need something?
Is it too late to get started with Zcash? If not would you recommend buying it or trying to mine it? Last question, would AWS be a good resource to mine it?
This service looks really awesome! I think there may be a slight spelling mistake on the first line of the "Introduction" section. It say's "I love newsletters, but I have receiving e-mails", should that be "hate" ?
I would be really interested in setting up an exit node and doing my part to help people with privacy and other issues get access to an open internet. Where would be the best place to start? I'm afraid that I'm not quite as technically advanced as the Author of the article so setting up the auto email responders and such would be difficult - can you just ignore the emails?
Hey, it's the Author here.. You don't have to be very technical with that.. There are plenty of tutorials, some are "official" in the Tor Project website, and some not. Unfortunately you have to reply to these e-mails otherwise they may follow up or see that you never reply and follow other means of contacting you. Truth be told, I don't know. I've just read some info on their website.